How Your Steppit Course Builder Works

Resource for

All Channels

Your course builder is where it all begins – this is where you can start planning your course and creating your content. To get started, here is a quick guide to help you navigate your course builder and explain each of its feature. This way, you can get the most out of Steppit to create a stellar course!
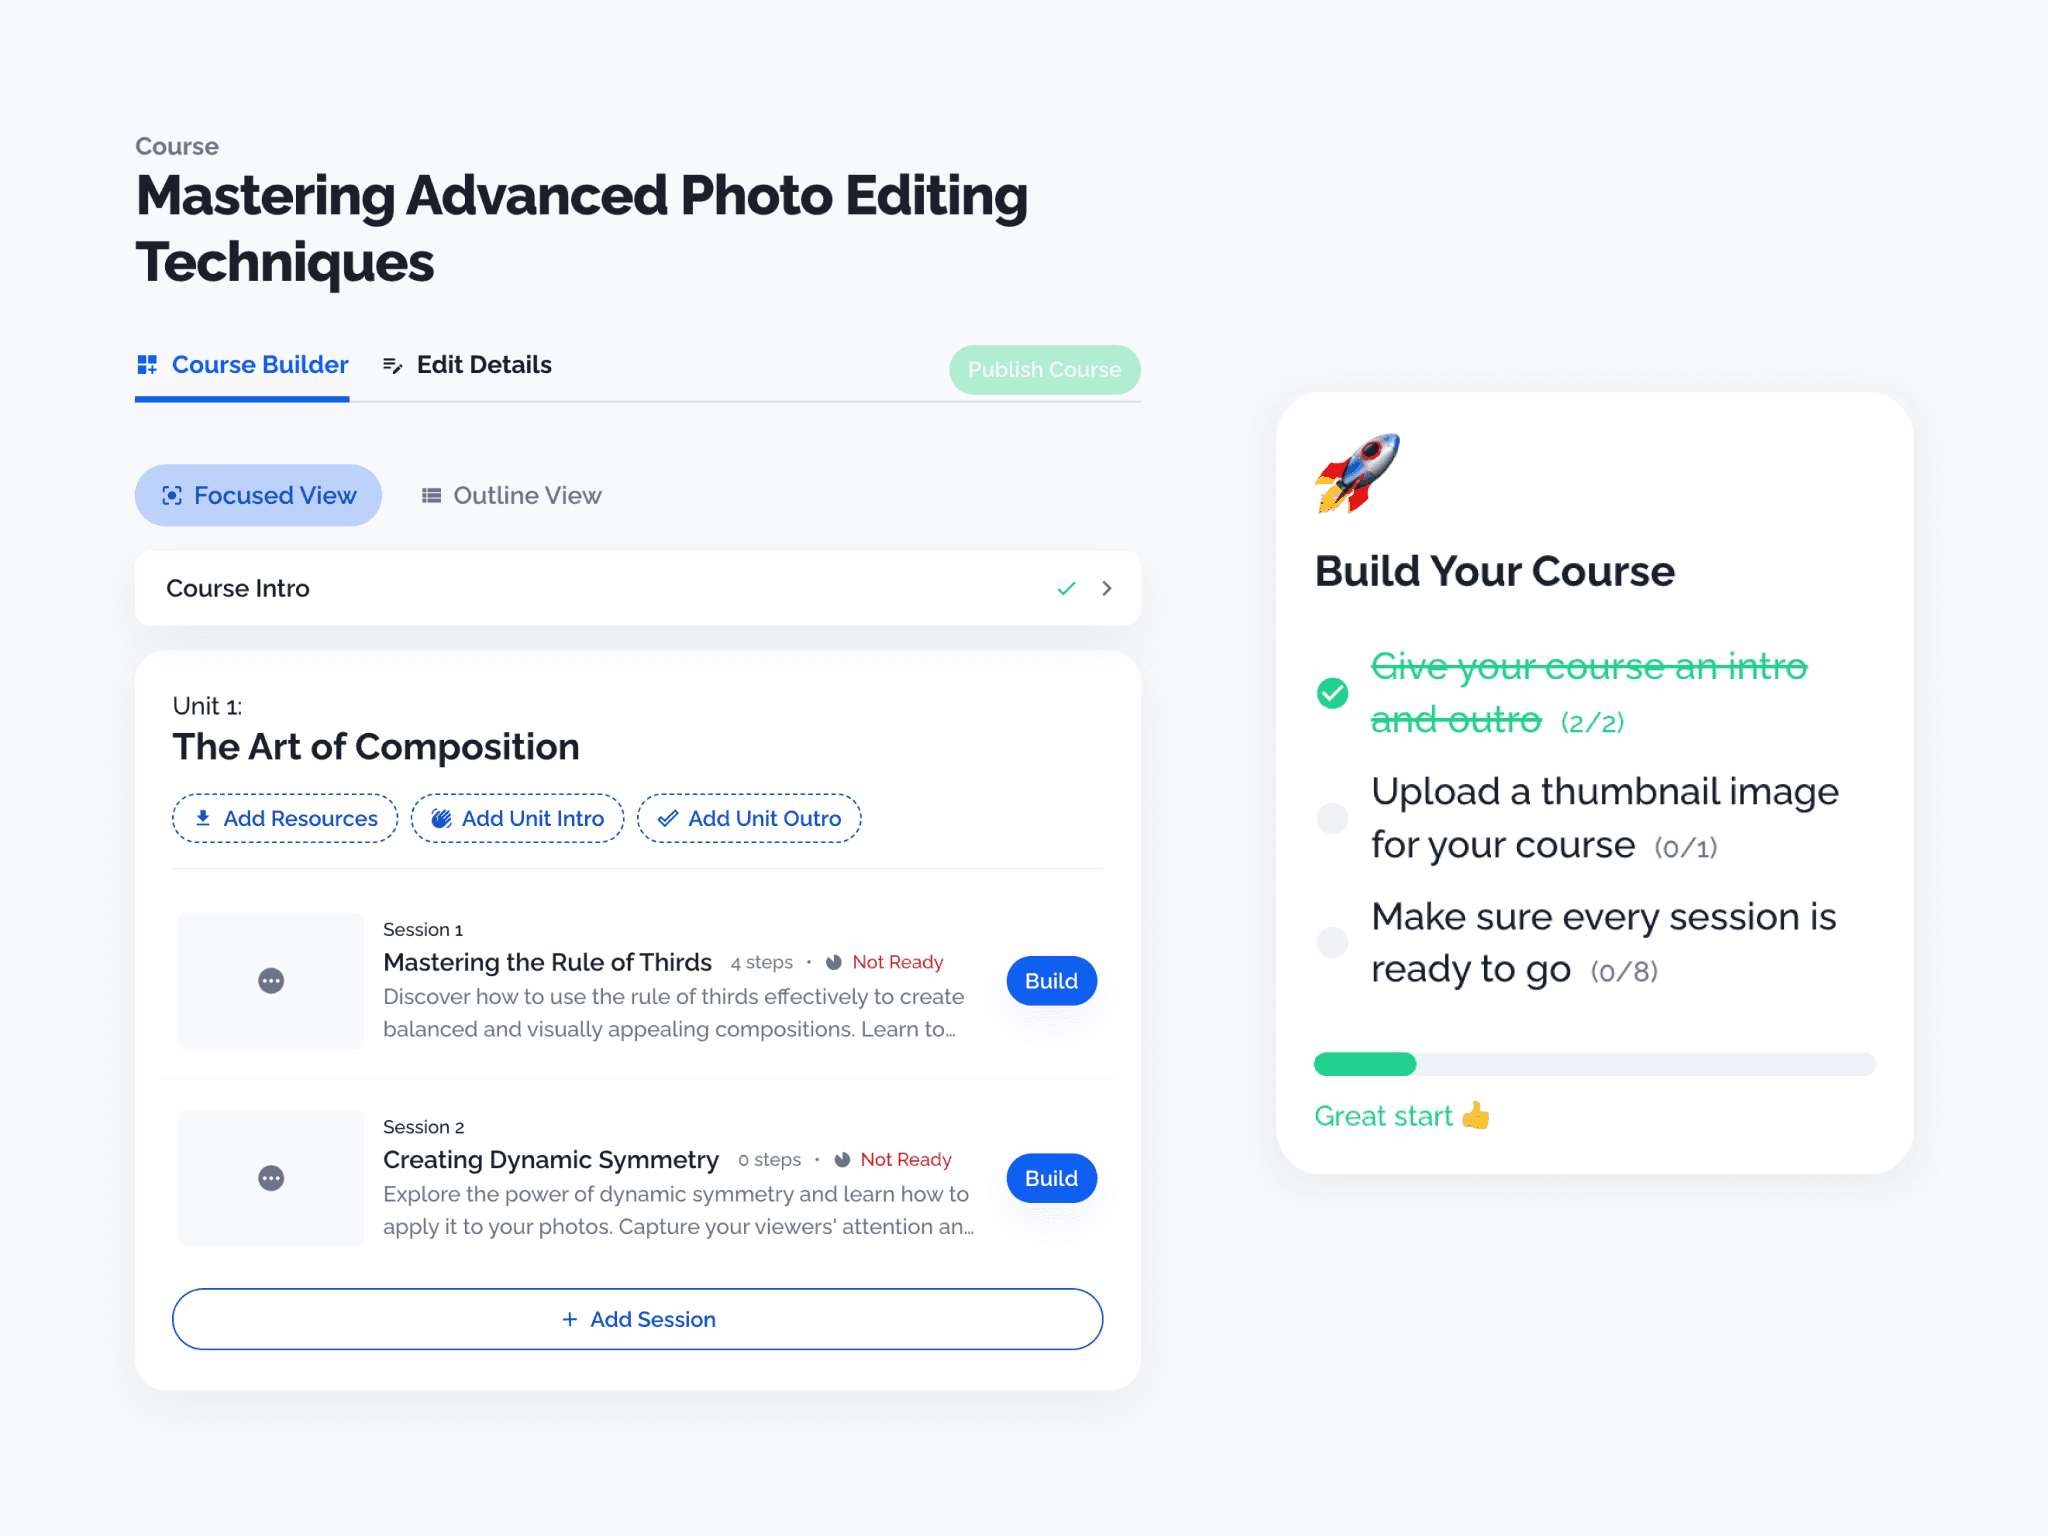
Your course builder

Example Course Builder

Course Focus View

Your course focus view shows you the unit you are focusing on. Your course units cover a subtopic of your course.
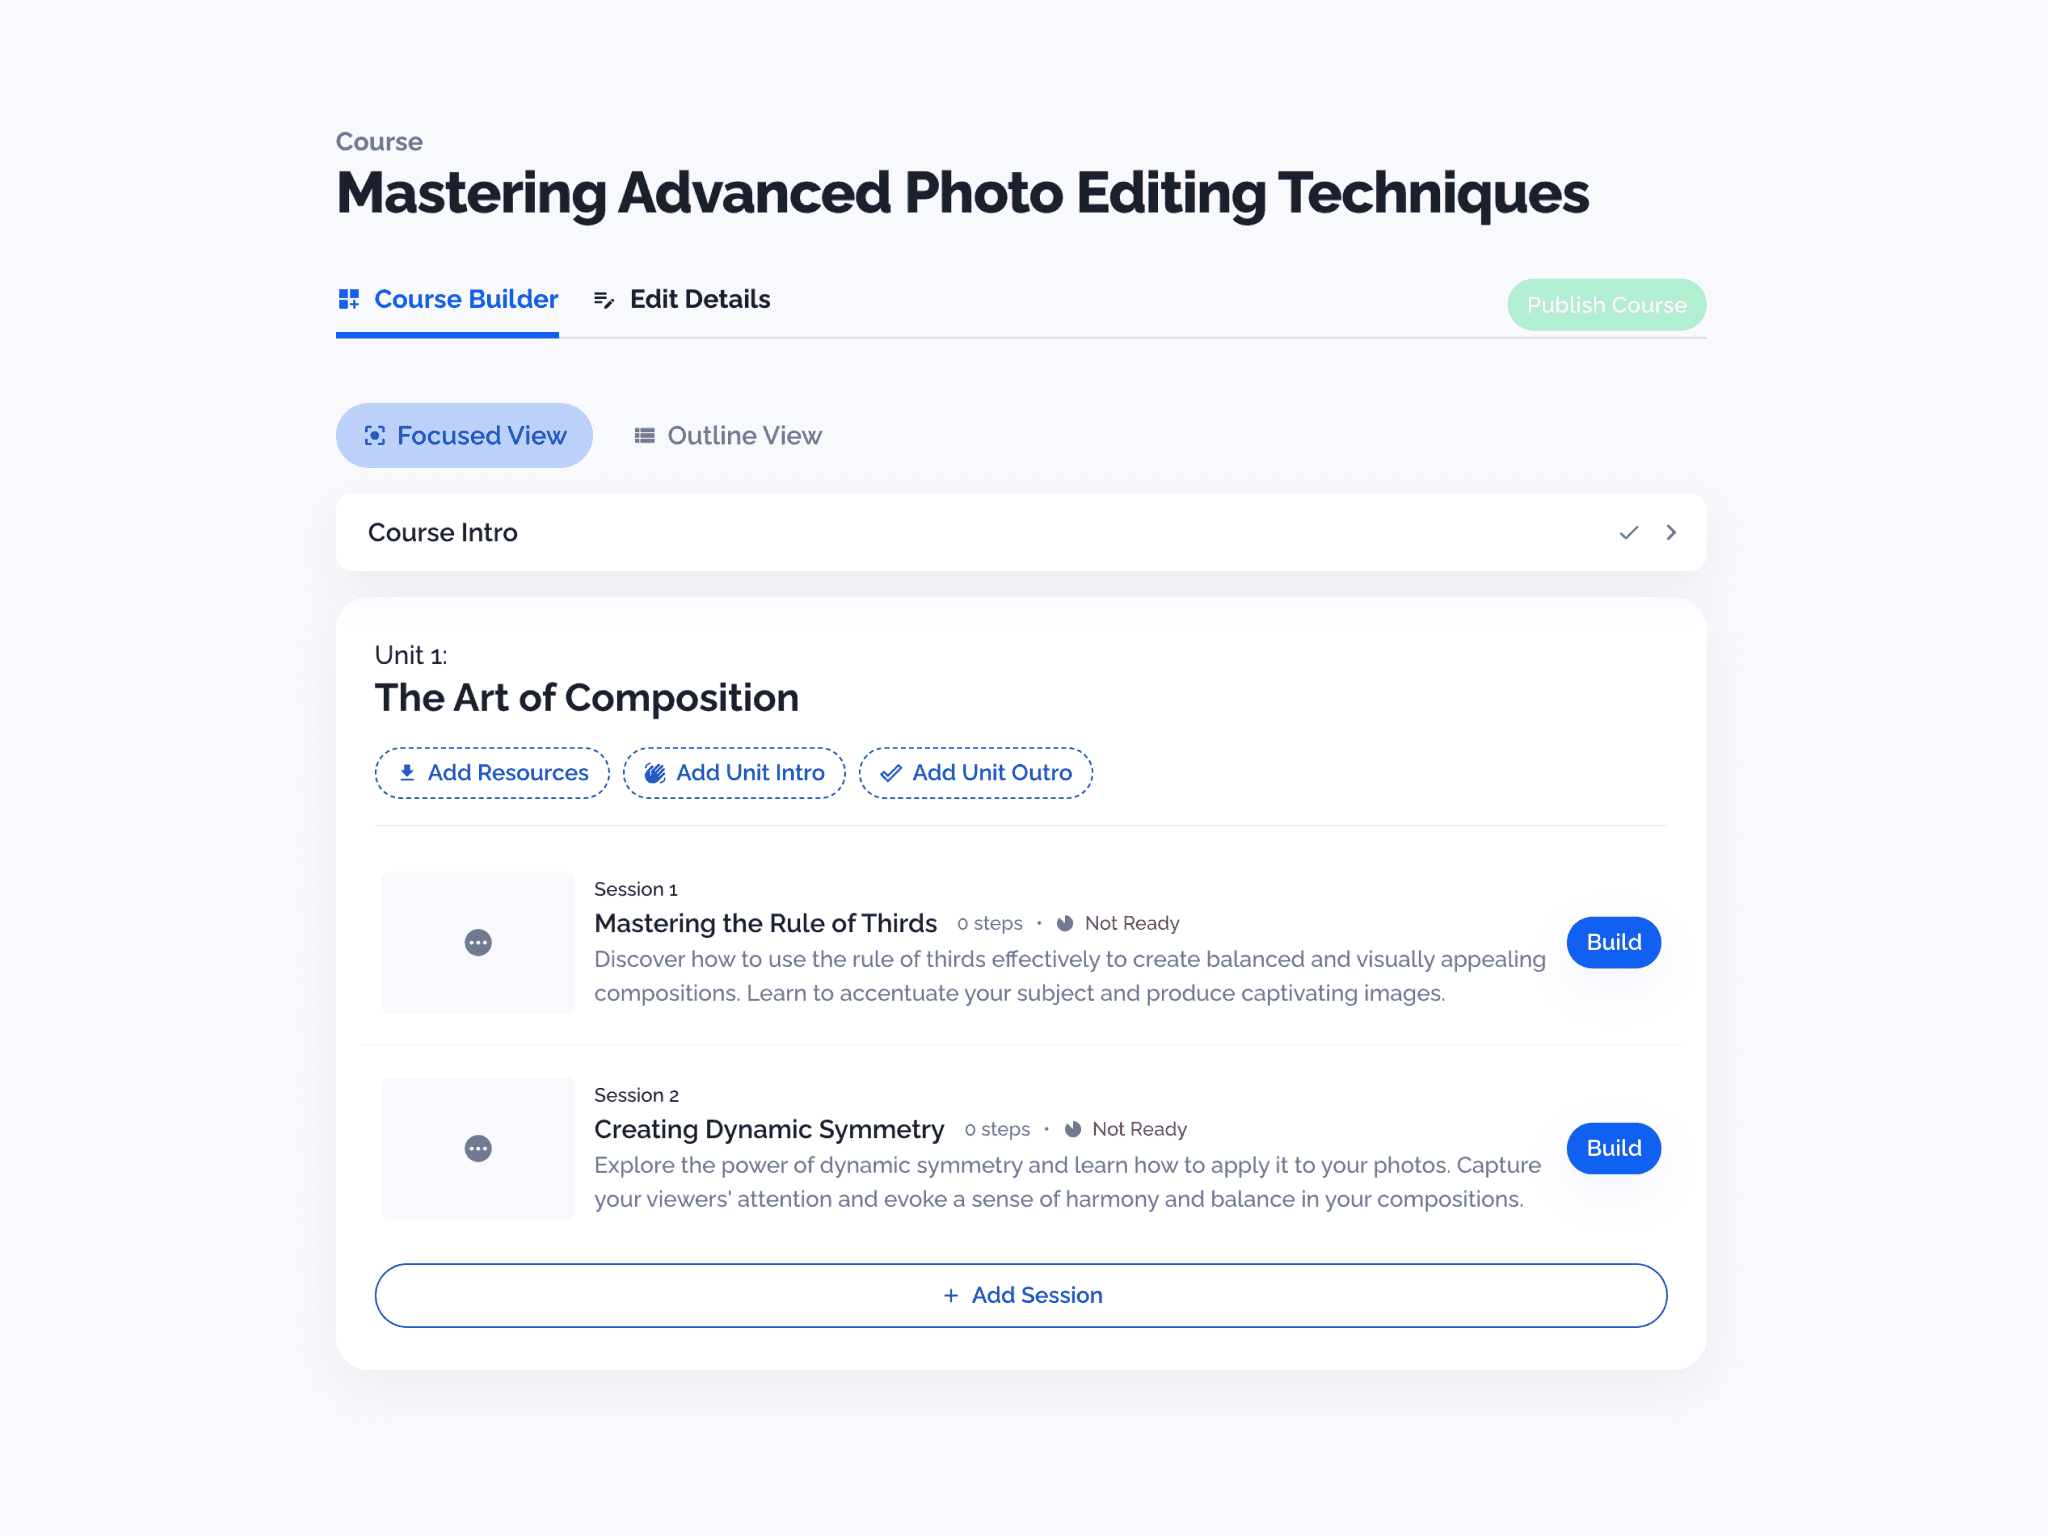
Example Course Builder Focus View

  • Expand a unit to view the sessions within it, and from here you can see which sessions you still need to work on.
  • Click ‘Build’ on your session to start planning what you will cover, or to add content.

Course Outline View

Your course outline view shows you a high-level view of all your units and sessions at once.
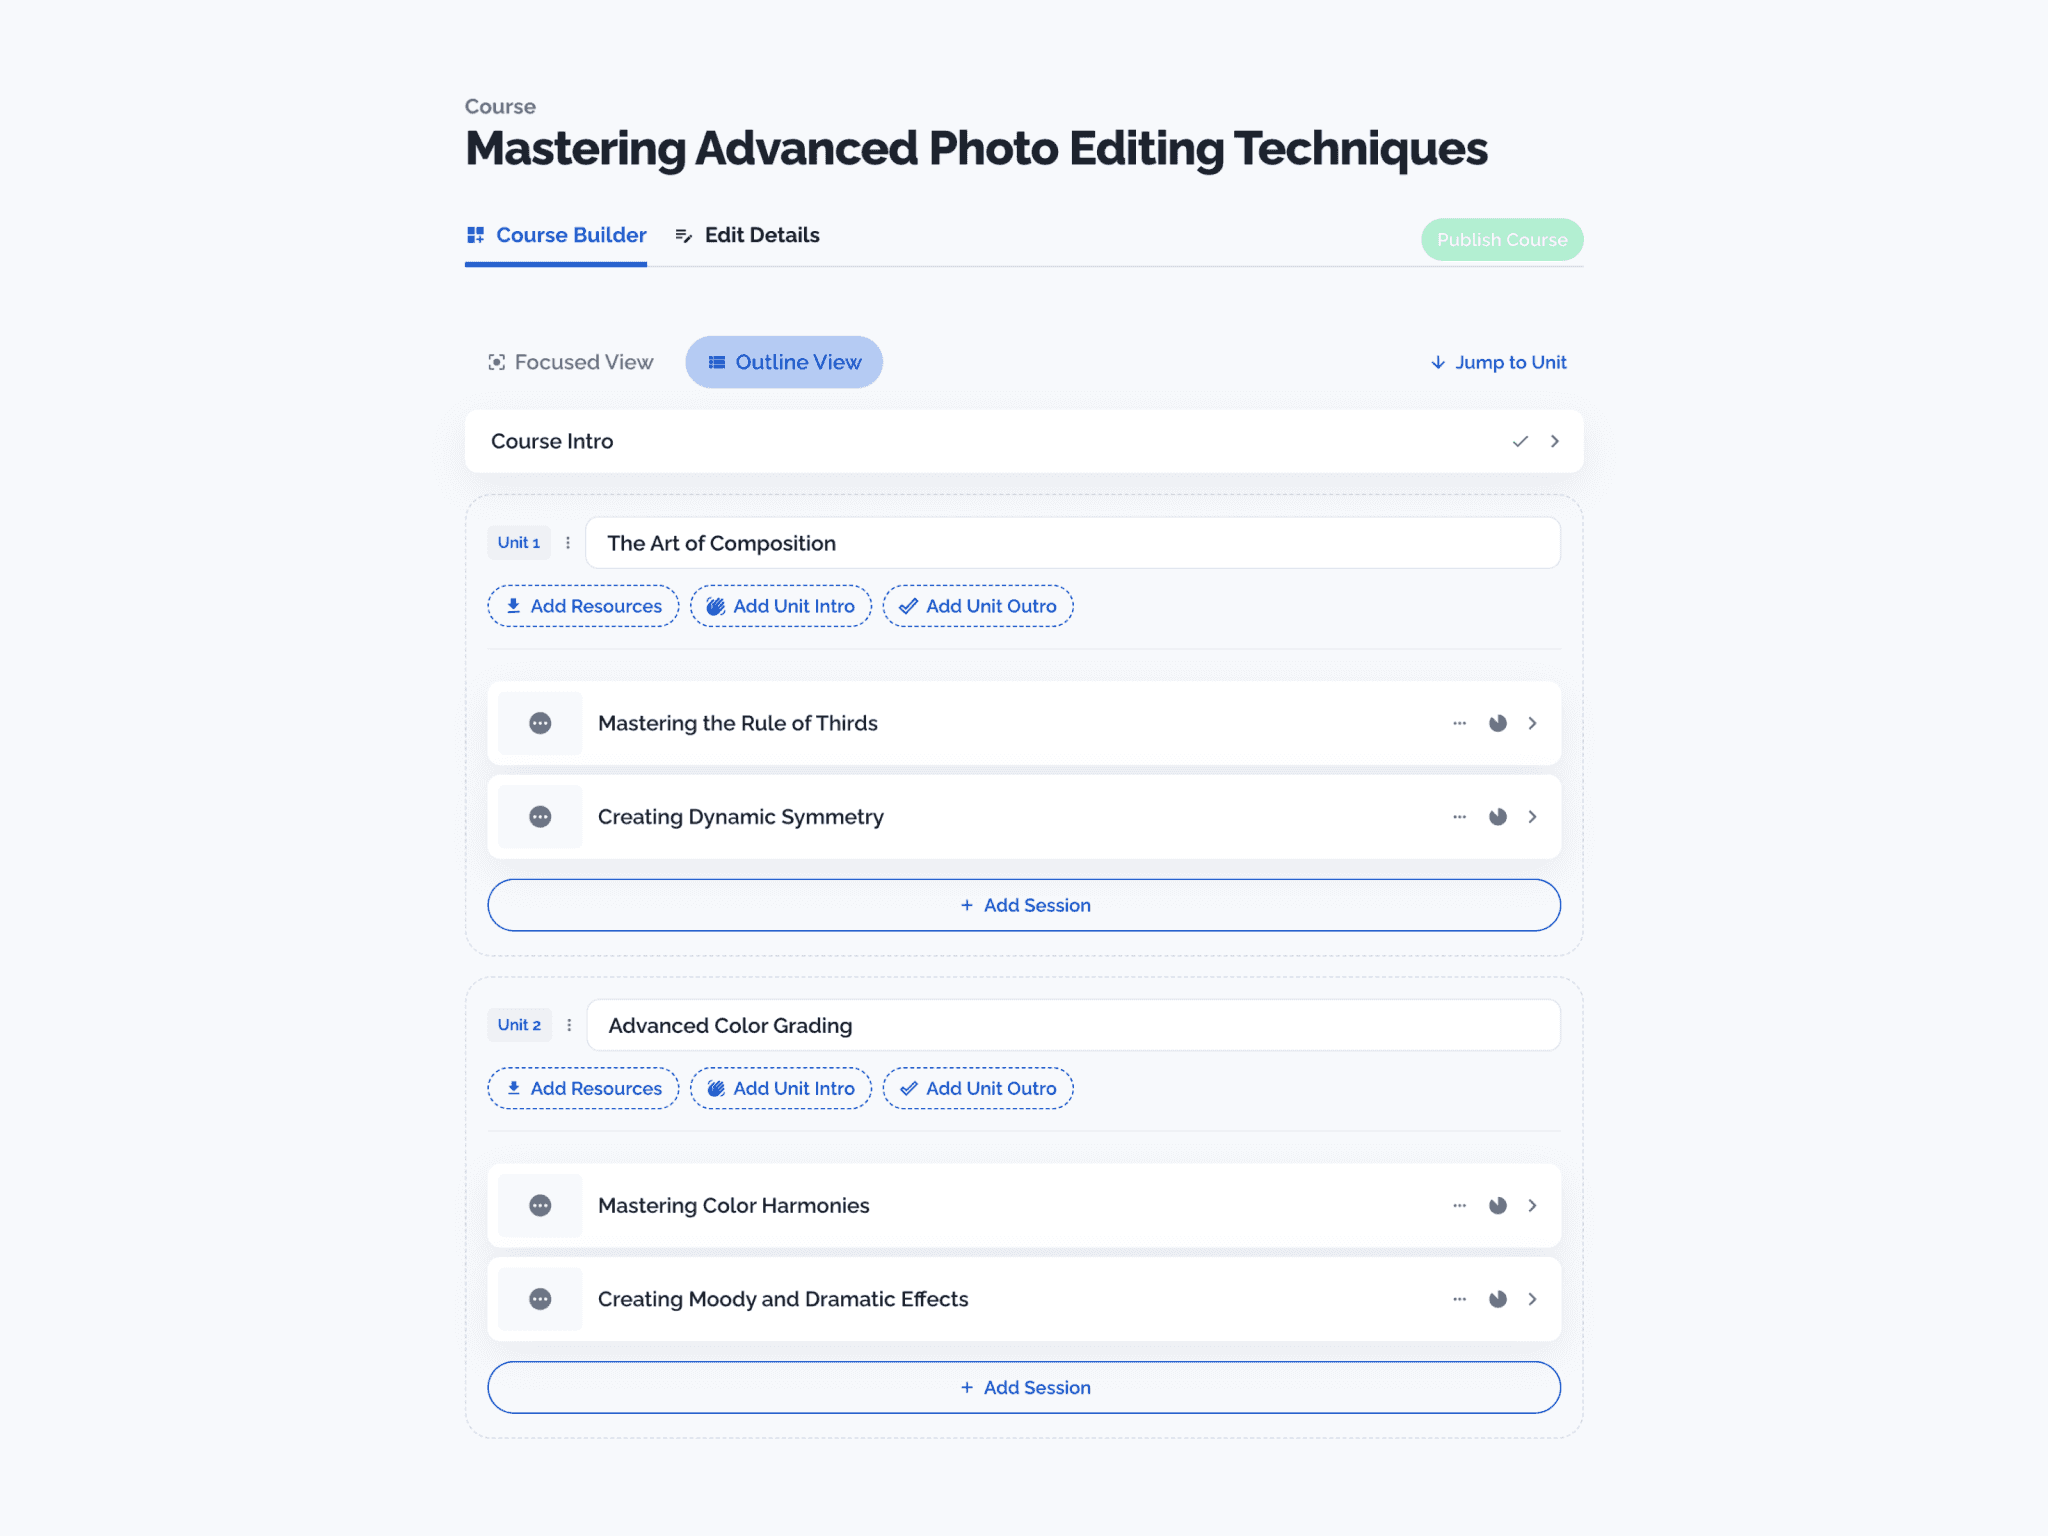
Example Course Builder Outline View

Within this view, you can:

  • Click on a session to start building
  • Quickly ‘Add a Session’ or delete sessions (click the three dots and select ‘Delete Session’)
  • Drag and drop units and sessions around to re-order them (click and drag the unit number or session thumbnail).
  • Upload a course thumbnail image
  • Include a course subtitle (optional)
  • Add unit intros and outros to bookend each of what you covered and add ‘Resources’, such as digital downloads or website links for extra reading.

Your session builder

Your sessions cover each new skill, activity or mini-project within your course. When you first start building a new session, you will be taken to our session planning guide. For a full guide on how this works, find the article here.

Session Outline View

Your session outline view shows you a high level of all of your session steps. This view is best for making edits to your session structure or uploading lots of content at once.
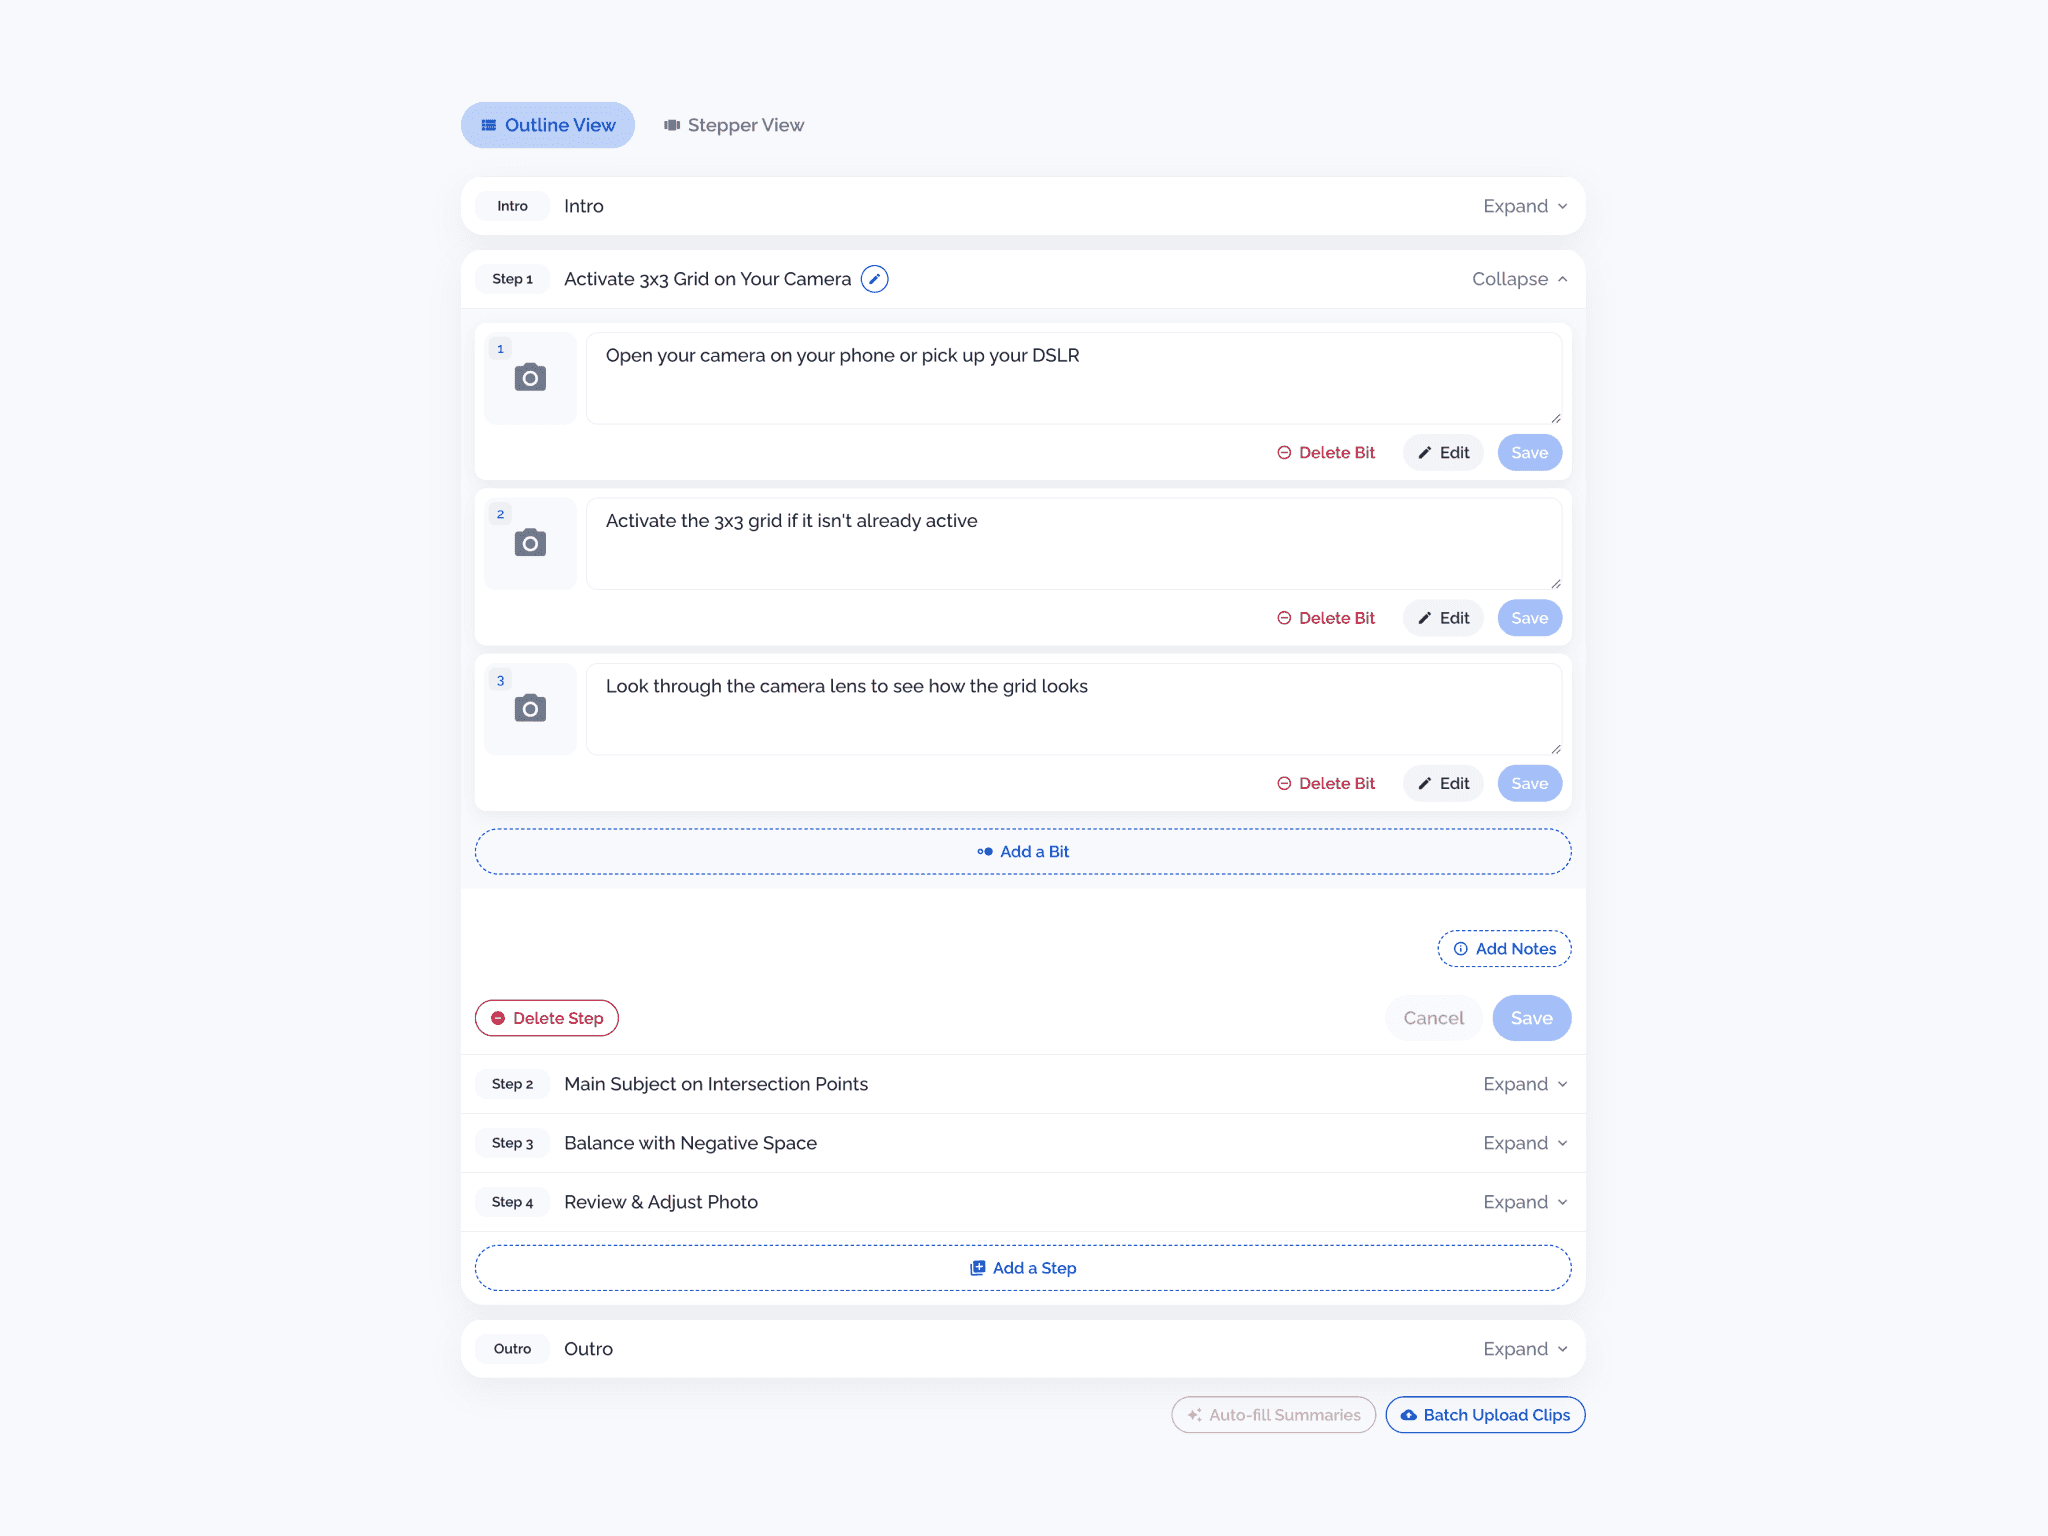
Example Session Builder Outline View

From here, you can:

  • Expand a step to view all the bits of content within it
  • Edit the name of your steps (click the pencil icon)
  • Add media to each bit of content by clicking on its thumbnail (e.g video, audio, images)
  • Quickly 'Add a Bit' of content, 'Add a Step' or remove them with the 'Delete Bit' and 'Delete Step' buttons.
  • Upload content in batch using the ‘Batch Upload Clips’ button

Session Stepper View

Your session stepper view gives you sense of what your course will look like to your viewers. Using this mode, you can feel the context of how your session will be received whilst you are building and adding your content.
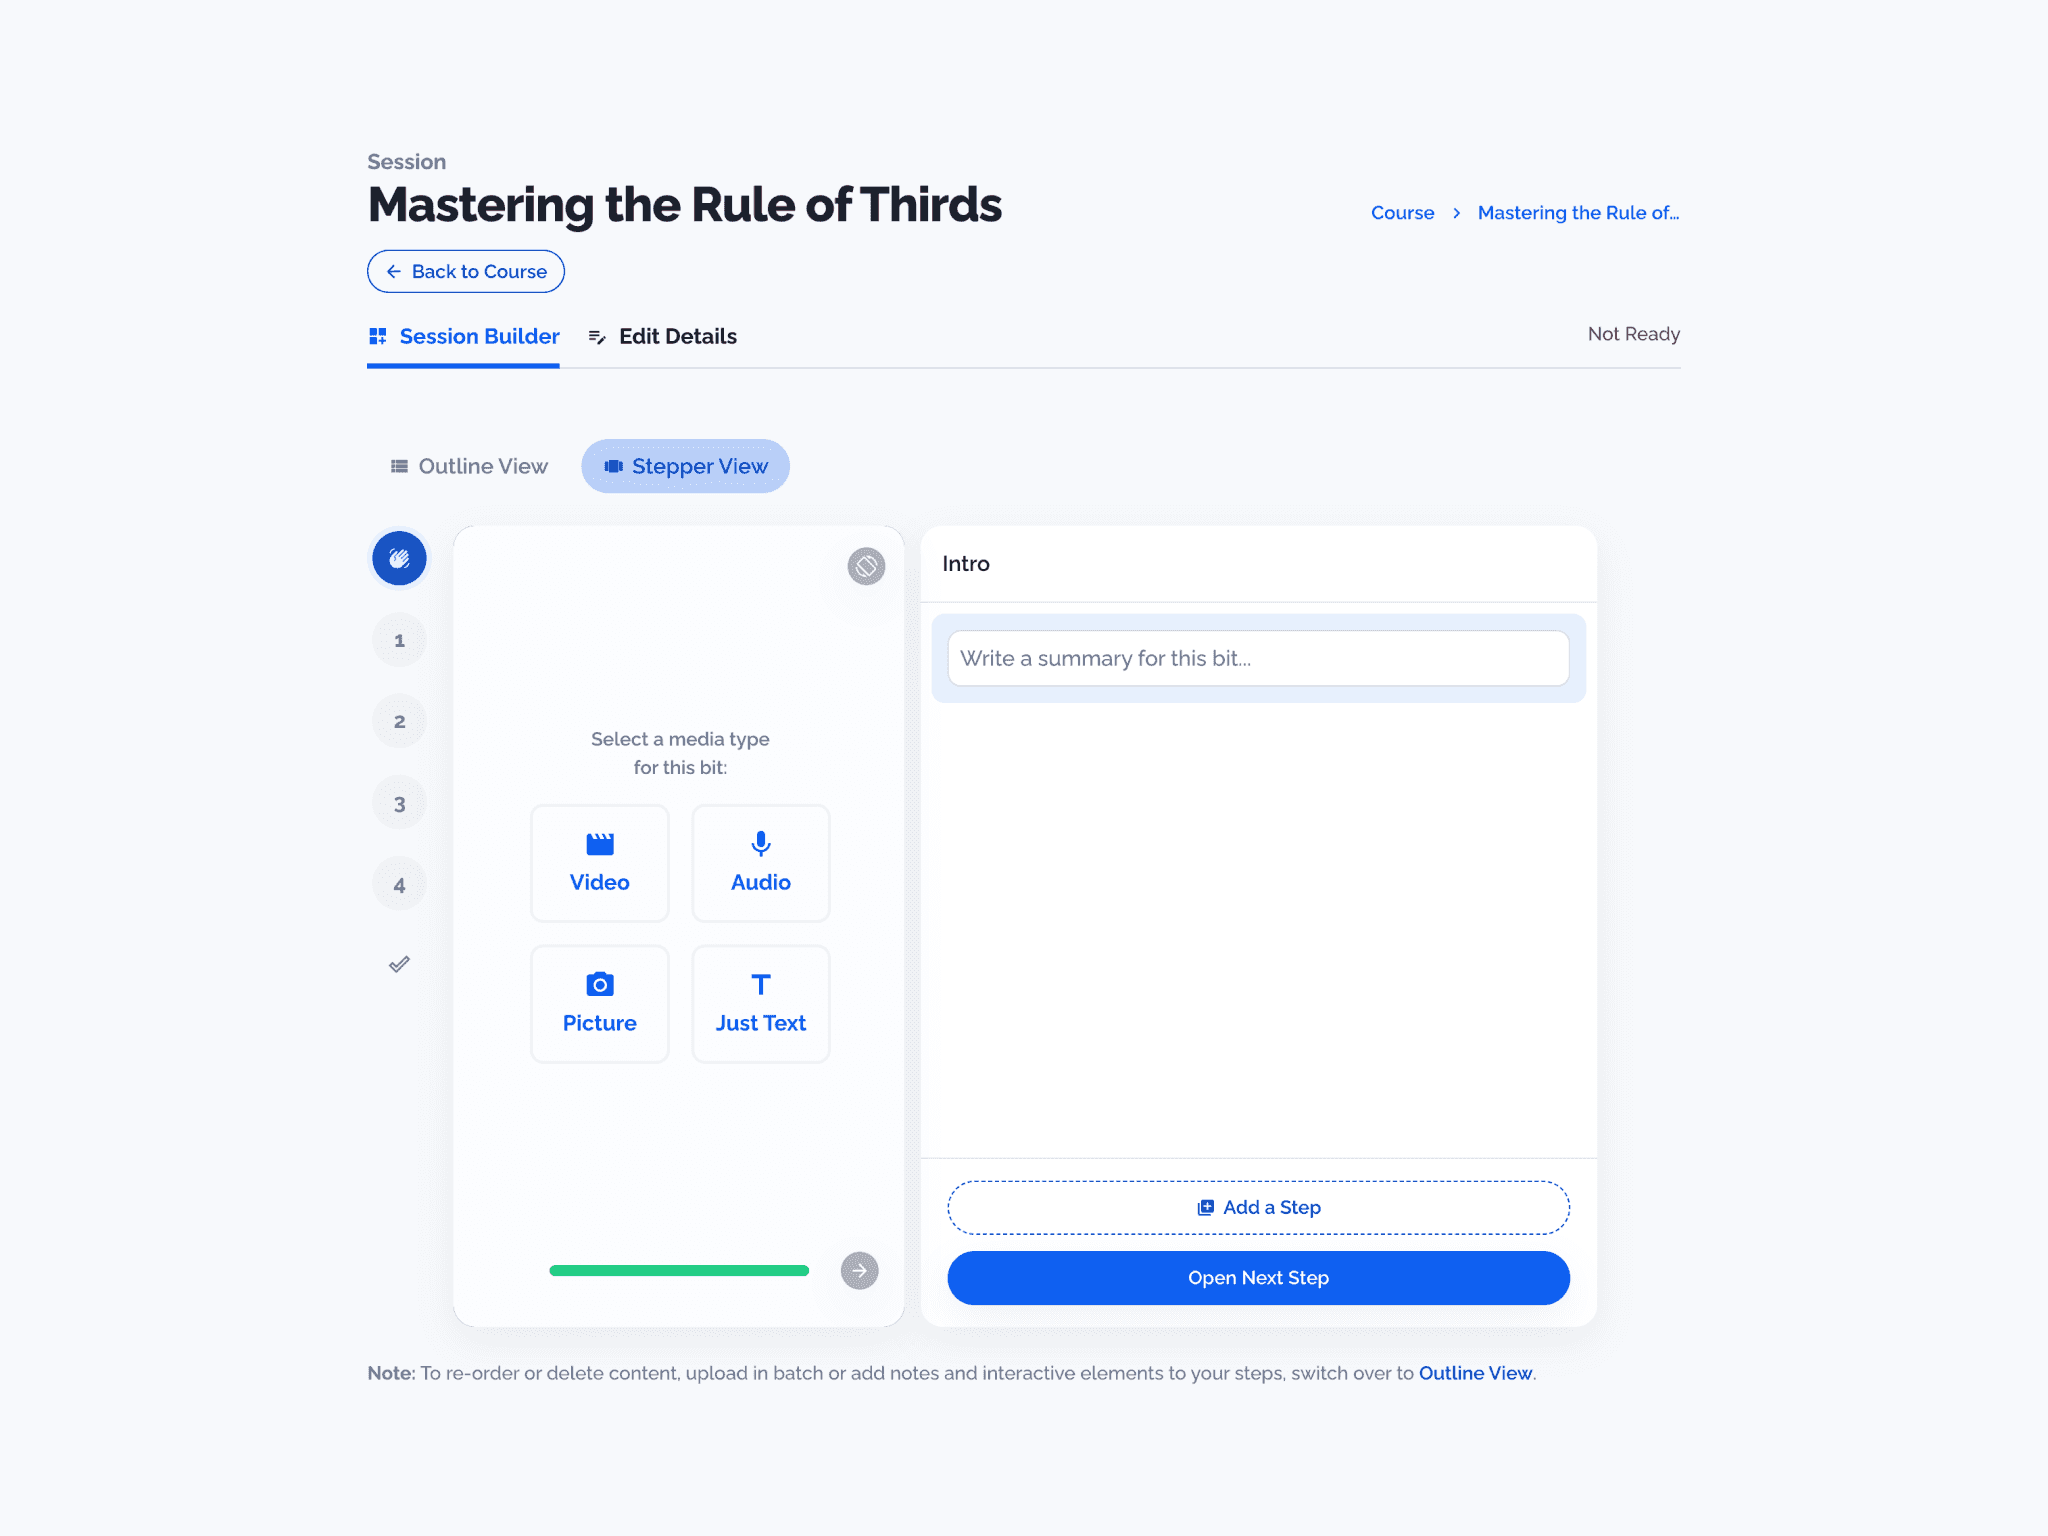
Example Session Builder Stepper View

With this view, you can:

  • Add steps, new blank bits of content and write summary text for each bit
  • Upload your content (videos, audio or images)
  • Watch your session as a preview, navigating through each step.

And there you have it! We hope you found this article on how to use our course builder useful. You’re now ready to get started in creating your own engaging and interactive online course! 🚀

If you’re not yet on the wagon, make use of a one-week free trial of Steppit Pro and try out all of the above features to see if they’re for you.

Did you know you can request features and be a part of the immediate future of Steppit? Check out our product roadmap here and vote for your favourites to get them underway.

Need anything else or want to know more? Chat with us on Discord, we’re on hand right now to help.

Tags

creator

Learn More

Browse resources
Featured image for post How to Upload PDFs and Resources

How to Upload PDFs and Resources

You can upload supporting documents to your courses to give your learners extra reading, homework…

Read More

Newsletter illustration

Need More Help?

🙋

Email Us

support@steppit.com


💬

Join Our Community

Chat with the team & other creators

Company

Product Roadmap

Light

Dark

Auto

Made with

❤️

in the UK

©2024 Workshop Tech Solutions Ltd.